


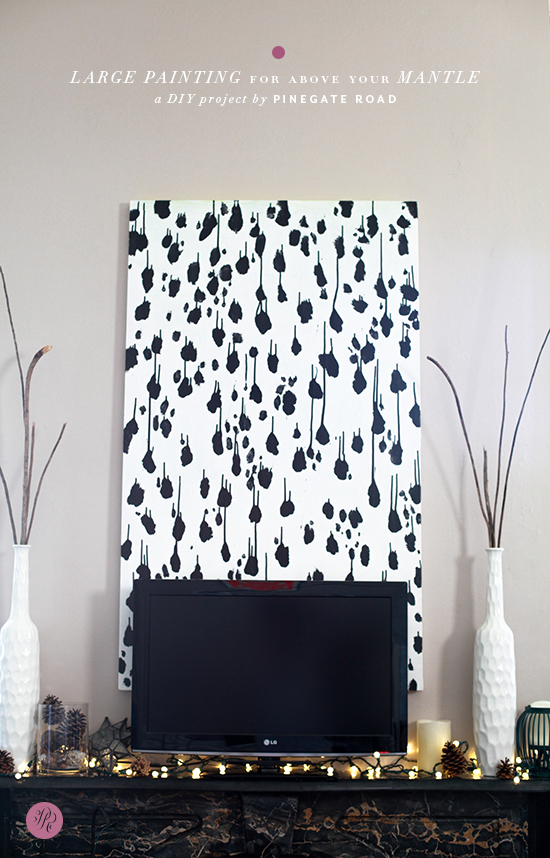
DIY | large painting for above a mantle
I finally did it you guys! I’ve seriously had this project prepped for months, and plans to get it done for years. Yeah, you got that one right! Last night I had the perfect mix of getting out of my night class early, my computer packed away in my bag, and enough energy left to not just sit on my couch at eat kettle corn and watch jeopardy. The kettle corn kind of still happened, but only after I was waiting for this baby to dry and I was going mad after breathing in fumes for an hour or two. Yeah. That quite possibly happened.
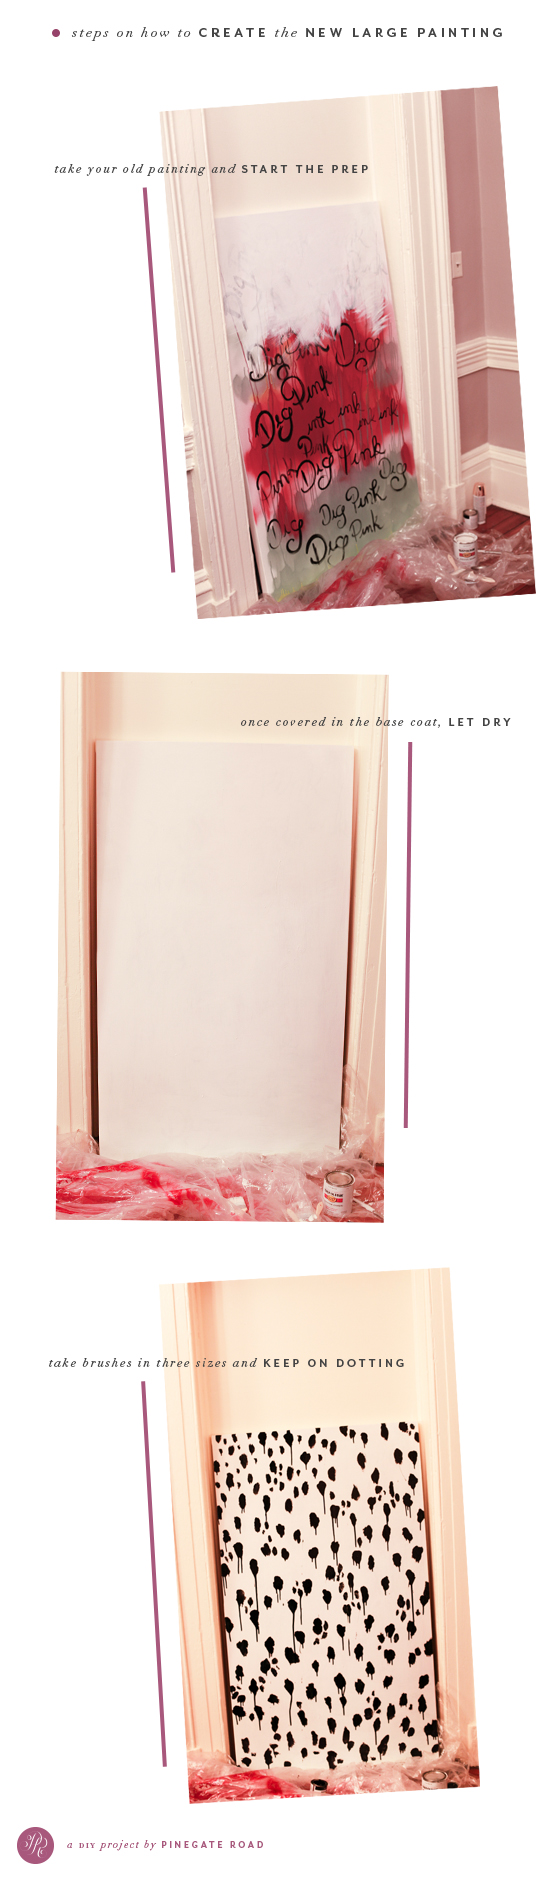
Anyways! I wanted to share the process of how I created this so you might be inspired to create your own large painting for above a mantle — or really anywhere for that matter. When I first moved to Savannah I scored this huge canvas at a local art store for a whopping $30. I’ve since used it as a blank canvas to work out some lettering details and as a backdrop for several spray-painted projects. It was more or less a work station for my messy endeavors. I always knew that I wanted to turn it into a fun painting for above my mantle, but I never had the vision or the time to just go for it. This fall, when the explosion of the dalmatian / snow leopard / black and white polka dot explosion happened all over pinterest, I knew I’d found my pattern. That was totally a thing, right? It wasn’t just me? Ok, good. (EDIT: Note, this article). So I set off to find some cheap paints—you can clearly see from the top of this painting that the white acrylic paint I was using at first clearly wasn’t working out for me. After spending a total of probably $10 I bought two small cans of white and black wall paint along with some cheap brushes I could toss out after this was finished.
WHAT YOU’LL NEED:
—large canvas
—small can of white paint (or whatever color you want your base color to be)
—small can of black paint (or whatever color you want your dots to be)
—four brushes: one large for prepping the canvas, and three of varying sizes for your dots
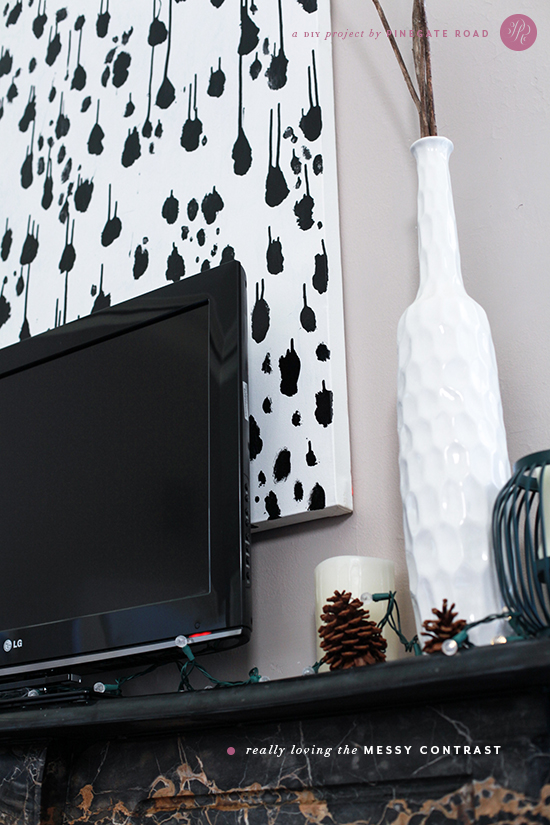
For this project, I started by prepping the canvas with white paint. I used the largest brush to cover over the paint that I’d already gotten all over my canvas. After waiting about 30 minutes—and I suggest waiting longer, I’m just terribly impatient—you can start getting dotty. Starting with your largest brush, create an all-over pattern consisting of your largest dots. With your medium sized brush, go around and start to create smaller clusters of dots, leaving some of the large dots in singular spaces. This rhythm creates more of an art-like piece with the composition rather than creating an roll-over pattern. Just a little. I’m sure real artists friends are cringing at this description! Sorry guys! Next, take your smallest brush and place dots around where you made these more dense clusters. Now, you wait. As I did this, I quickly noticed that I had over-saturated my paintbrush and a lot of the dots started to run. I kind of liked the look, but if you don’t want this effect, make sure to use just the right amount of paint. Once dry, I hung the painting upside down above my mantle. I liked the way the drips now faced upward, giving a different kind of effect.
I’d love to see if you decide on using this tutorial to dot anything of your own!
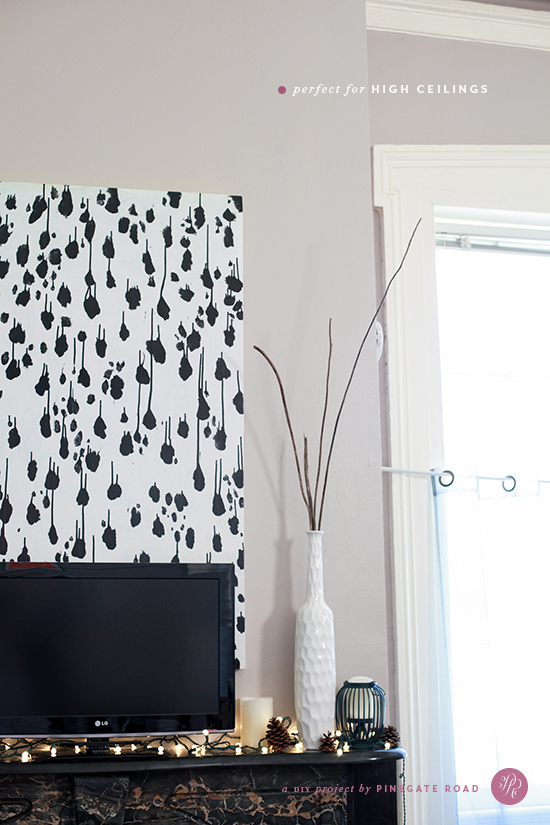
I hope you enjoyed this DIY on how to create a large painting for above a mantle — I LOOOOVE mine, and it works so great with my high ceilings! I made a vine of the process if you want to check out a little more of how this project was done. If you’re on vine and would like more insights to the process behind my daily creations, search for me under Kelsey Cronkhite.
Hope you all have a wonderful Wednesday!

scale your business!


YOUR WAY TO $10K CHALLENGE
Ready for a custom plan to scale your online business? Join me in this workshop where I’ll teach you exactly how to scale your online business to consistent $10k+ months!
YES, SIGN ME UP!
1
3
2
4
ANATOMY OF A PERFECT PIN
Looking to boost your traffic with Pinterest? Grab our guide on creating perfect pins! You’ll learn how to make sure your pins stand out, and learn how Pinterest can boost your sales organically!
let's do this
25 PROFITABLE OFFERINGS
FOR SERVICE PROVIDERS
Stuck on what to sell? I’m sharing my favorite ways to scale your business with services! Each of the 25 offerings I go over shares how you can create $10k+ per month in additional revenue in your online biz.
I'm ready to scale
25 Valuable content ideas
Don't know what to say on social to actually make sales? In this free training you'll learn 25 ways to show up to give amazing value to your audience! Each of these ideas are created to help you build trust with your dream people so they turn into customers over time.
yes, please!
FUN FREE RESOURCES • SCALE YOUR ONLINE BUSINESS • 6-FIGURE YEARS • LIVE YOUR DREAM LIFE

AS SEEN ON:

